

How to convert audio formats, rip and burn CDs on Mac?
- A through guide about mediAvatar Audio Converter Pro for Mac
mediAvatar Audio Converter Pro for Mac consists of audio converter, CD ripper and CD burner, which can convert and extract audio formats, rip Audio CDs to audio files and burn audio formats to music CDs on Mac.
Furthermore, there're many other editing options allowing Mac users to adjust sound effect or clip audio files.
For clarity, we divide the guide into 5 parts to describe each feature step by step.
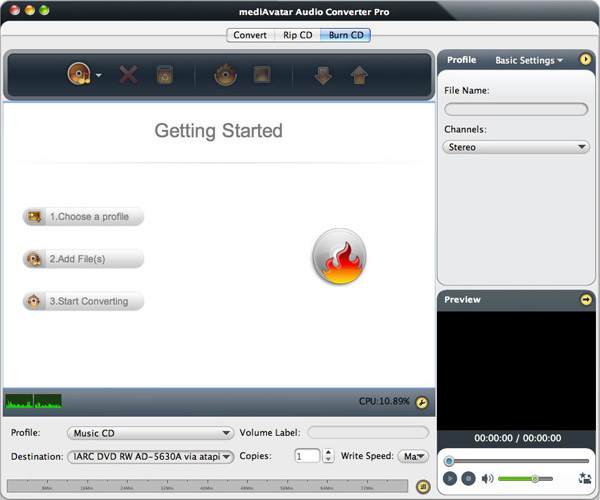
First download, install and launch mediAvatar Audio Converter Pro for Mac. You will see how this Audio Converter Pro Mac looks like:
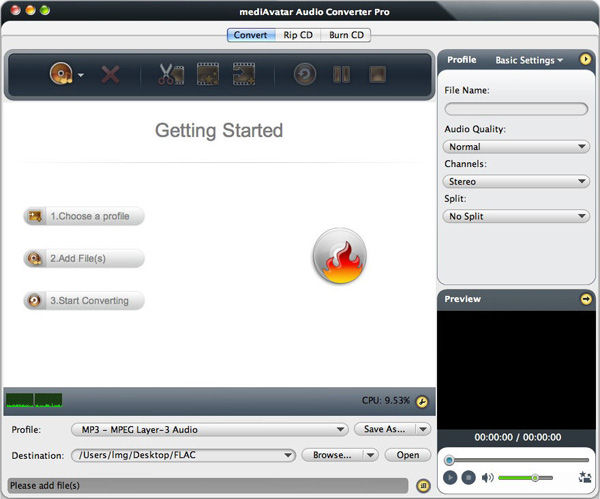
Part 1: Convert Audio Formats
Click "Convert" label to make sure you're in the "Convert" module before you start to convert audio formats on Mac.
Step 1: Load Files
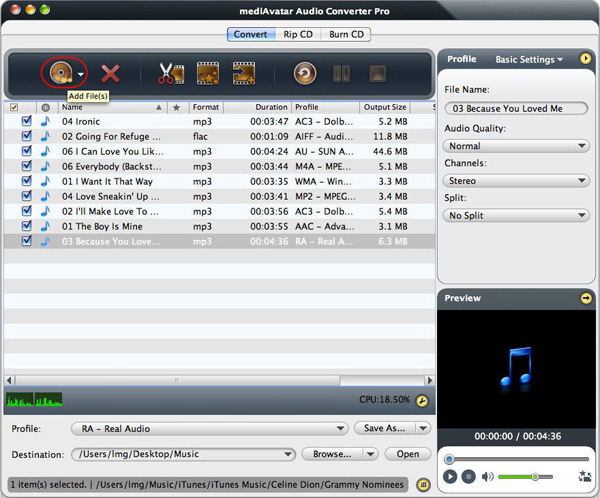
Drag and drop video/audio files from your Mac to this mediAvatar Audio Converter Pro for Mac, or click on "Add File(s)" button on the toolbar or choose "File > Add File(s)..." menu option to select the files you want to convert and load them into the file list. Or choose "File > Add Folder" menu option to select a folder and add all the supported files in this folder into this Audio Converter Pro Mac.
Step 2: Choose Output Destination and Format
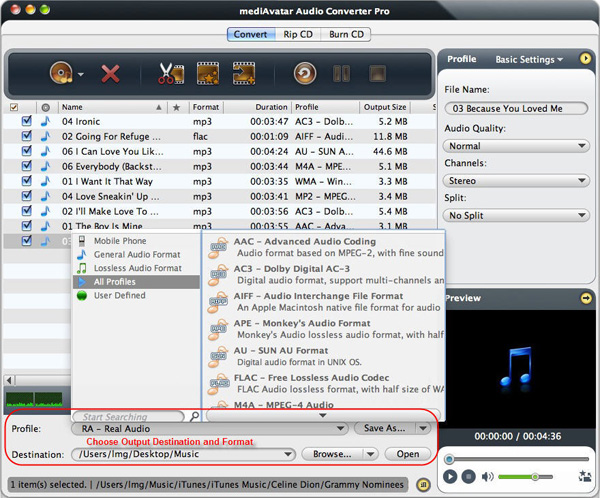
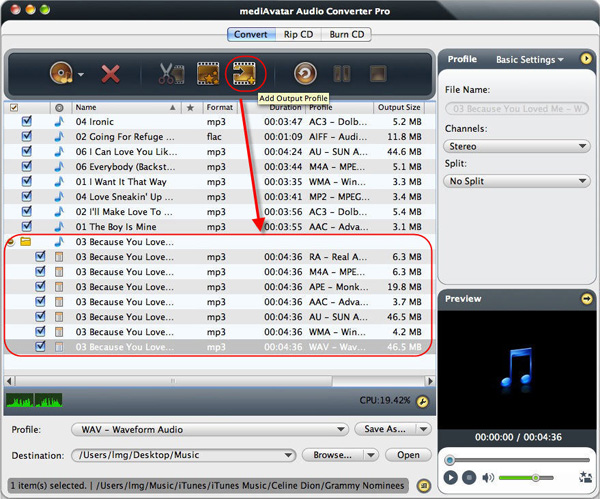
As the illustration above shows, click "Browse" button to choose an folder for the selected files as the destination for saving the outputted audio files. You may set different output folders for different files.
If you connect your iPod, iPad, iPhone or PSP to your computer, and expand "Browse" drop-down list by clicking the right arrow at the right and then choose "Ouput to iPod", "Ouput to iPad", "Ouput to iPhone" or "Ouput to PSP" option, then mediAvatar Audio Converter Pro for Mac would output the target audio files to your connected devices automatically after audio converting.
Click to open "Profile" drop-down list to choose the output profile you want for the selected files.
And if you want to set many output formats from the same file, then choose the file, click "Add Output Profile" button to add a profile and select an output profile from the "Profile" drop-down list. Repeat the step to add as much output profiles as you want for the file to get them converted simultaneously.
Generally, all the output profiles are optimized in the output parameters. However, you can still change the output parameter settings by clicking the right arrow beside "Basic Settings" at the right top to open the "Advanced Profile Settings" window.
Step 3: Convert audio formats
Before converting, make sure you have all the settings ready. If you want to do more with your audio files, you may refer to "Part 4: Clip Audio Files" and "Part 5: Adjust Sound Effects".
Otherwise, just click "Convert Checked Item(s)" button on the toolbar to start converting audio formats now!
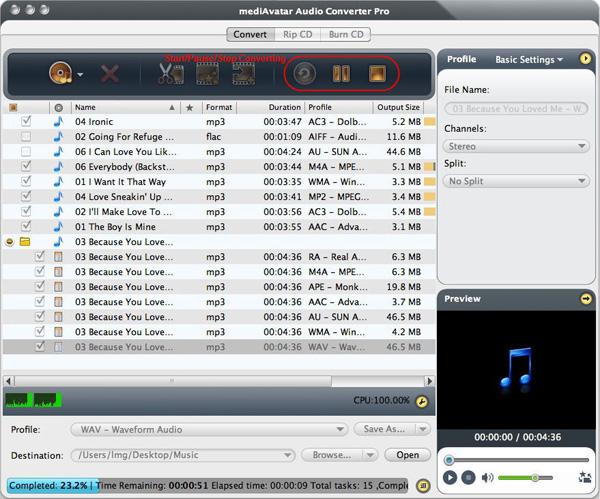
The audio conversion would be finished in a wink! Click "Open" button beside "Browse" to view the outputted audio files directly! That's all!
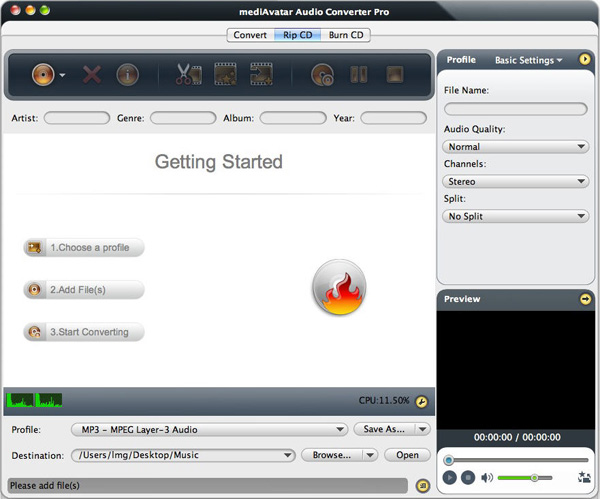
Part 2: Rip CD
Click "Rip CD" label to enter the "Rip CD" module.
Step 1: Load Audio CD
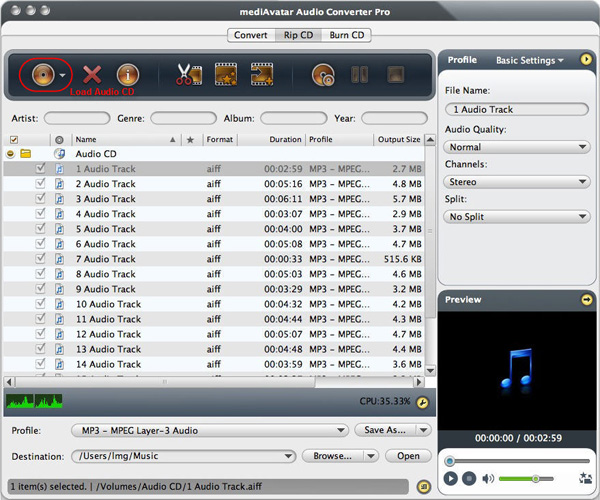
Insert the Audio CD you want to rip, click "Load Audio CD" button or choose "File > Load Audio CD" menu option to load the CD.
Step 2: Choose Output Format and Destination

Change the default output profile for the selected files you want from "Profile" drop-down list, and choose the destination by clicking "Browse" button.
And if you want, you can add many output profiles for a single file by clicking "Add Output Profile" button, as described above. And connect your iPod, iPhone, iPad or PSP and enable the corresponding output option from the "Destination" drop-downlist by clicking the down arrow beside "Browse" to let this Audio Converter Pro Mac transfer the outputted audio files to your device directly.
And if you want to do more with your audio files before ripping CD, please refer to "Part 4: Clip Audio Files" and "Part 5: Adjust Sound Effects".
Step 3: Rip Audio CD

All settings are ready? Click "Convert Checked Items" button to rip audio CD to music files!
Part 3: Burn CD
Click "Burn CD" label to enter the "Burn CD" module.
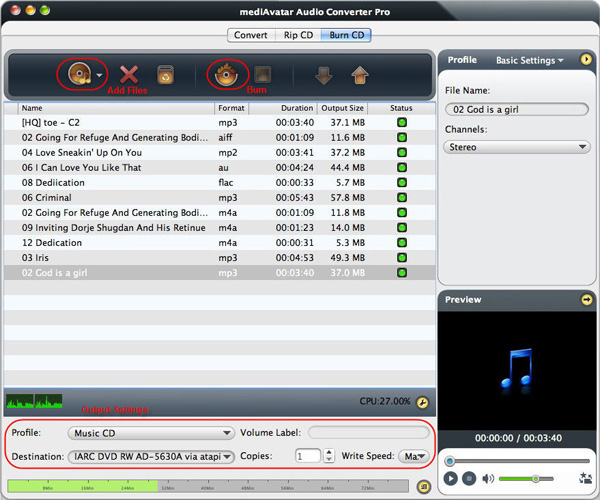
Step 1: Load Files
Click "Add File(s)" button or click "File >Add File(s)" menu option to load the video/audio files you want to burn, or simply drag & drop the files into the file list.
Step 2: Adjust Output Settings
Choose "Music CD", "MP3 CD" or "WMA CD" as the CD format from the "Profile" drop-down list.
Insert a recordable CD disc, and choose it from "Destination" drop-down list.
Enter "Volume Label" for your Music CD, and choose the number of copies and write speed you want.
From the status bar at the bottom, you can check whether these files you loaded can be fitted into this CD disc.
Step 3: Burn CD
All settings are ready? Click "Burn" button to burn these audio files to CD!
Part 4: Clip Audio Files
"Clip" feature is available in both "Convert" and "Rip CD" modules. Here is the sample.
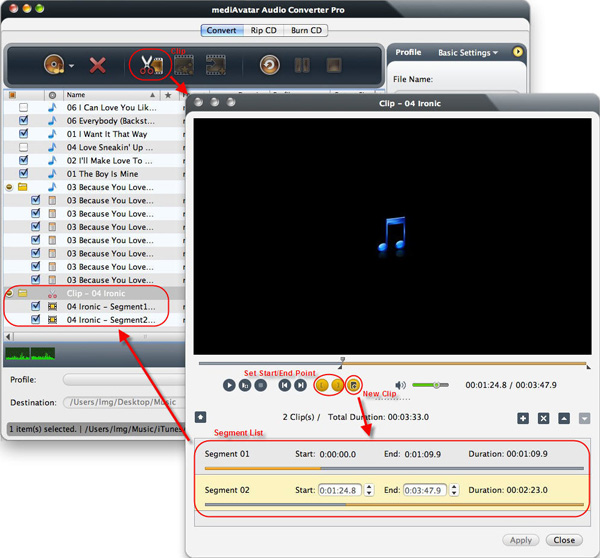
Step 1: Select the file you want to clip and click "Clip" button at the toolbar or right click the file to choose "Clip" option from the right-click menu, then the "Clip" window appears.
Step 2: There're two methods to add new segments.
Method 1: Play the audio/video file, when it comes to the very start point you want, click "Set Start Point" button to set it as the start time. And set the end time by clicking "Set End Point" button in the same way. Thus a new segment is added into the segment list. To add more, click "New Clip" button, then choose this segment and continue to play the file, and set its start and end points in the same way. Repeat to add as many segments you want.
Method 2: Click "New Clip" icon to add a new segment to the segment list, then set its start and end time by entering their values manually in the "Start" and "End" boxes. Repeat this step to add as many segments as you want.
Step 3: Click "Apply" and "Close" buttons to return to the main window. The clipped segments are already listed for later converting.
Part 5: Adjust Sound Effects
"Effects" feature is available in both "Convert" and "Rip CD" modules. Here is the sample.
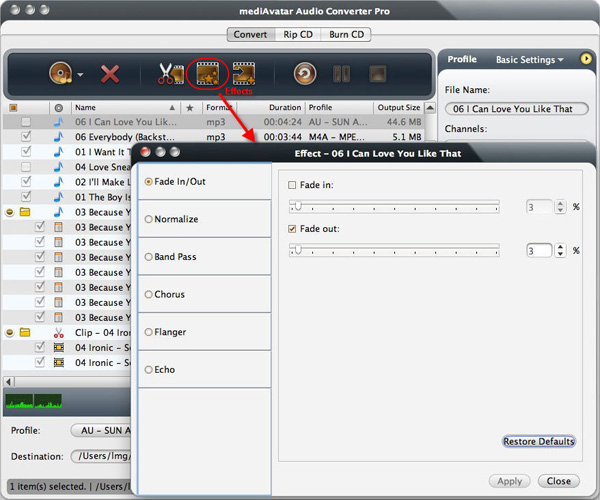
Step 1: Select the file from the file list and click "Effects" button at the toolbar, then the "Effects" window opens.
Step 2: Go to "Fade In/Out", "Normalize", "Band Pass", "Chorus", "Flanger" and "Echo" tabs by clicking the corresponding labels, and adjust the effects as required.
Step 3: Click "Apply" and "Close" buttons to return to the main window.
Go to this mediAvatar Audio Converter Pro for Mac to get a free Mac demo version and start converting audio formats, ripping and burning CDs on your Mac.