

How to make your own movie from different video formats using mediAvatar Movie Maker?
- A through guide about mediAvatar Movie Maker
This article is to describe how to use mediAvatar Movie Maker to make movie from video clips, clip/split/crop videos before making movie, as well as add soundtracks and transitions to your movie step by step.
First download, install, launch and register mediAvatar Movie Maker.
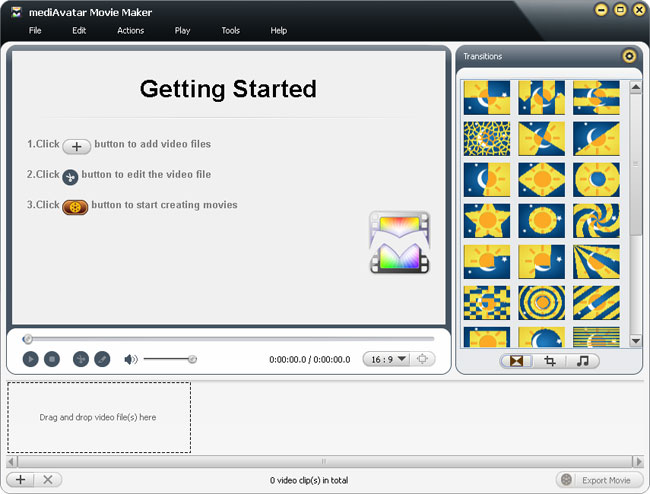
Step 1: Load Videos
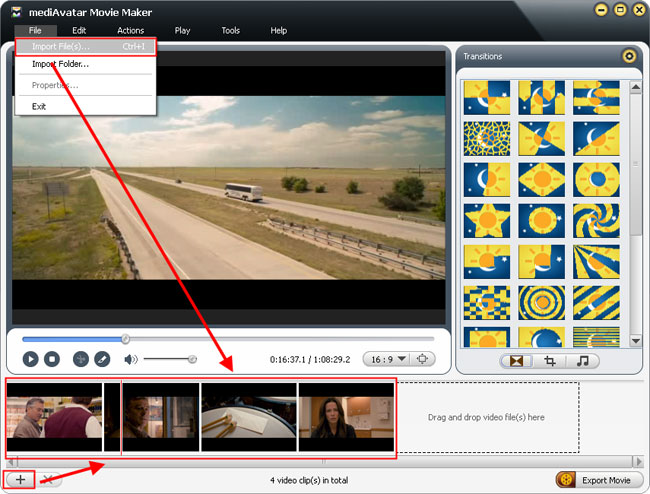
There're many ways to load video into this mediAvatar Movie Maker. You can drag and drop video files from your local disk to to video list at the bottom, or click the plus button at the right bottom or "File > Import File(s)" menu option then choose the video files you want in the dialog that opens and load them into this movie maker.
Below is the illustration of how to load videos into mediAvatar Movie Maker.
Step 2: Edit your videos
mediAvatar Movie Maker allows users to clip, split and crop videos, as well as add transitions and soundtracks to movie. Below we would introduce all these features in details.
Clip Videos
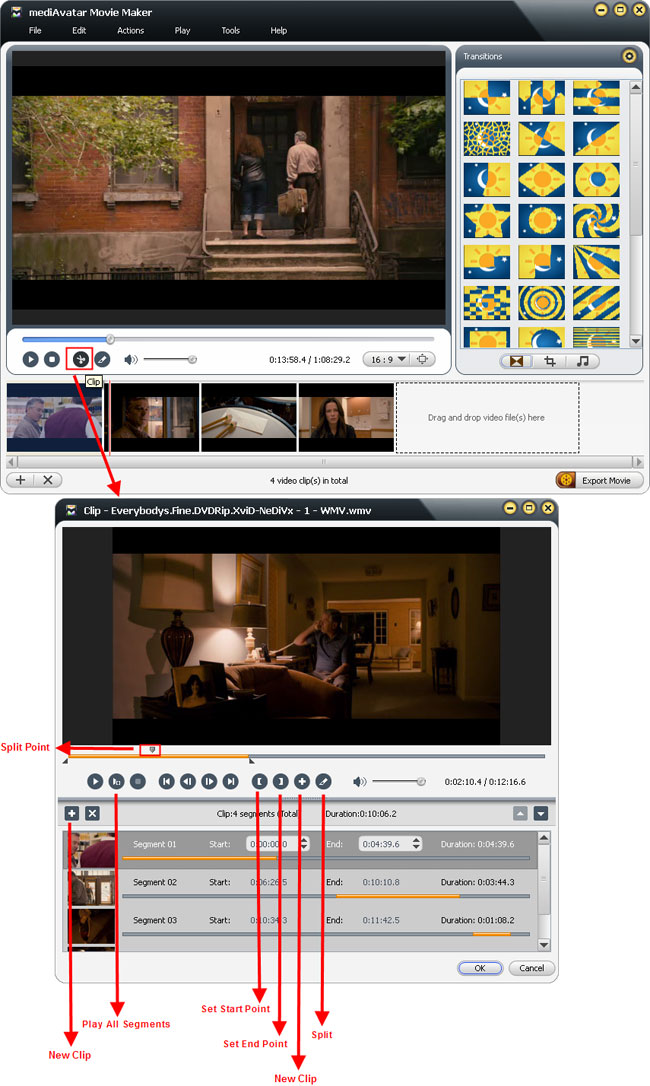
As the illustration above shows, click "Clip" button (like a scissor) below the player, then "Clip" window pops up.
Play the video, when it comes to the point you want it as start point, click "Set Start Point" button to set it as the start point, and click "Set End Point" button to set the end point in the same way, then a new segment will be added into the segment list below.
If you want more segments, then first click "New Clip" button, then a new segment will be added into the segment list but the start and end points need to be changed by clicking "Set Start Point" and "Set End Point" buttons in the same way above or entering respective values for the start and end points of this segment. Follow this method to clip as many segments as you want.
If you want to split a video or a video segment into 2 parts, the slider on the player progress bar is the split point, just click "Split" button to split the current selected segment into 2 segments.
Split Videos
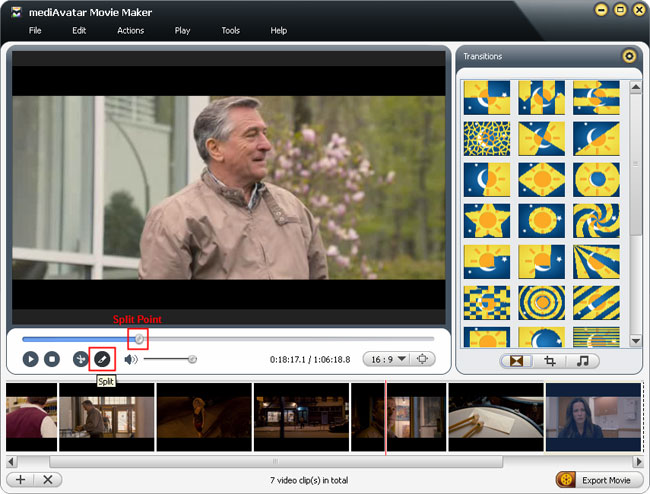
Besides splitting a video into 2 segments in the "Clip" window, you can also click "Split" button in the main interface to split the selected video into 2 segments, and the split point is just the slider on the player progress bar.
Add Transitions
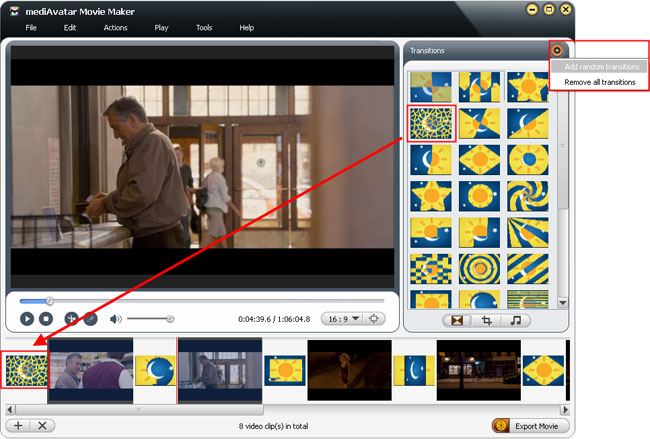
There's a "Transitions" panel at the right of the main window, from which you can add transitions to the videos you load.
Simply drag and drop the transition pattern to the place between each two videos to manually add transitions, or click "Settings" button from the right top of the "Transitions" panel to choose "Add random transitions" option to apply random transitions to all the videos.
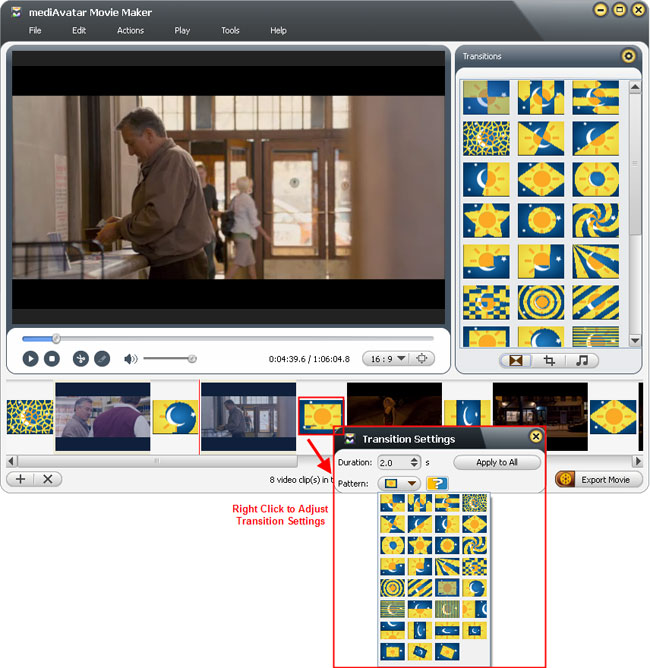
If you want to change one of the transitions, then right click the transition and choose "Settings" from the right-click menu, then the "Transition Settings" dialog opens, in which you can change the transition duration and pattern.
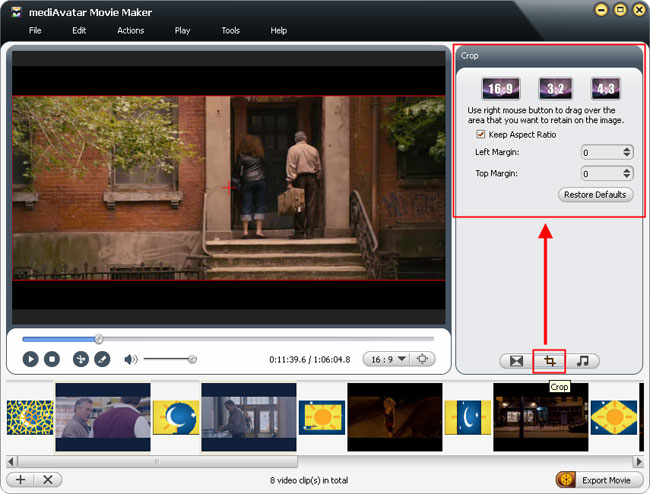
Crop Video Frame Size
From the right panel, click "Crop" option to enter "Crop" panel as the illustration below. Choose the aspect ratio you want (16:9, 3:2 or 4:3), set the left and top margin to crop frame size, or you can drag the rad lines on the player to directly change the video frame size.
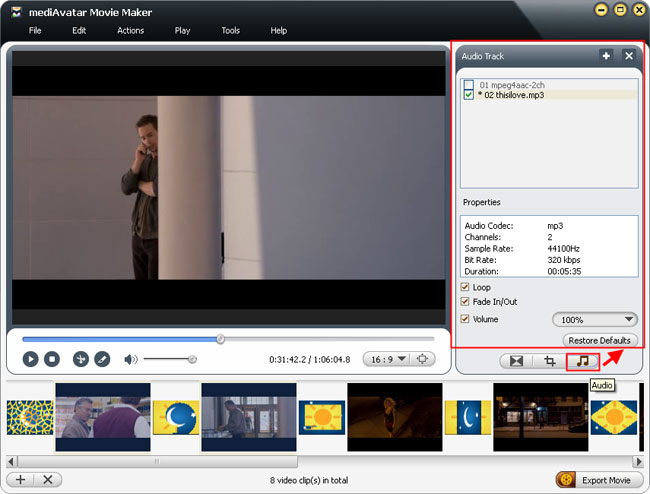
Add Soundtracks
From the right panel, click "Audio" button to enter "Audio Track" panel, in which you can add or change your video soundtracks by adding a soundtrack file into your video. Click the plus button at the right top of the panel, then click to check "Loop", "Fade In/Out" and "Volume" options as required.
Step 3: Adjust Output Settings
Finished editing videos? Now comes to the output settings.
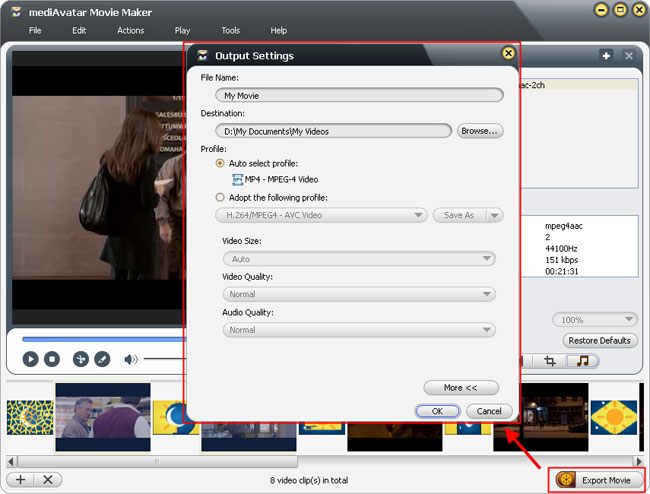
Click "Export Movie" button at the right bottom of the main window, then "Output Settings" window appears, in which you can change the file name, destination and output profile of the outputted movie.
In the "Profile" option, you can let the movie maker choose output profile automatically or change the option to "Adopt the following profile" option, then click to open the profile list.
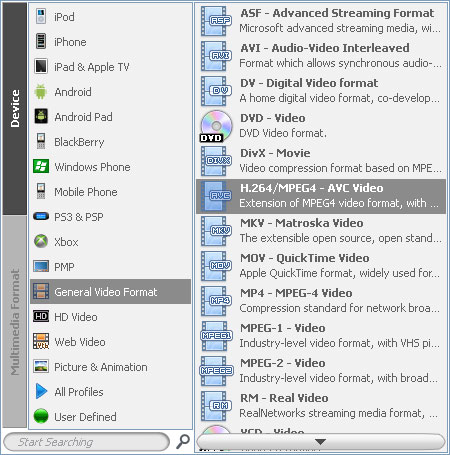
Here is the profile list. Click to enter the category you want and choose the output profile you want.
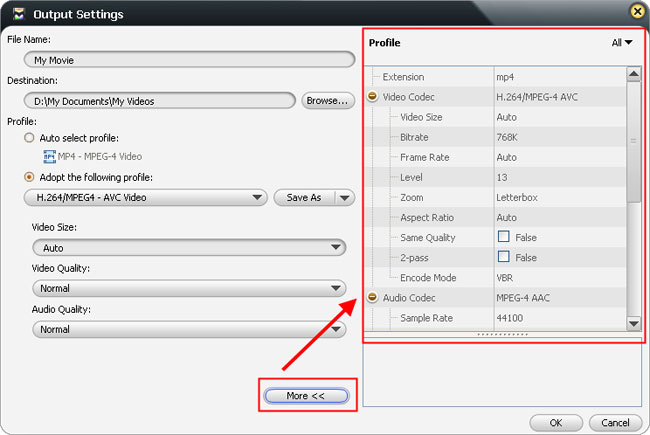
Besides the "Video Size", "Video Quality" and "Audio Quality" options available for you to adjust, you can make any changes of other profile settings by clicking "More" to switch to the "Profile" panel.
Step 4: Make Movie!
Now comes to the last step! Are you sure you have completed all the settings and editings? If yes, then click "OK" button in the illustration above, then the movie maker will start creating video automatically just as you see in the illustration below.
If you have other important things to do, then choose "Exit Program", "Stand By", "Shut Down" or "Hibernate" option from "Post Task Action" drop-down list, otherwise leave it as "Do Nothing".

And before making movie, there're also other options available.
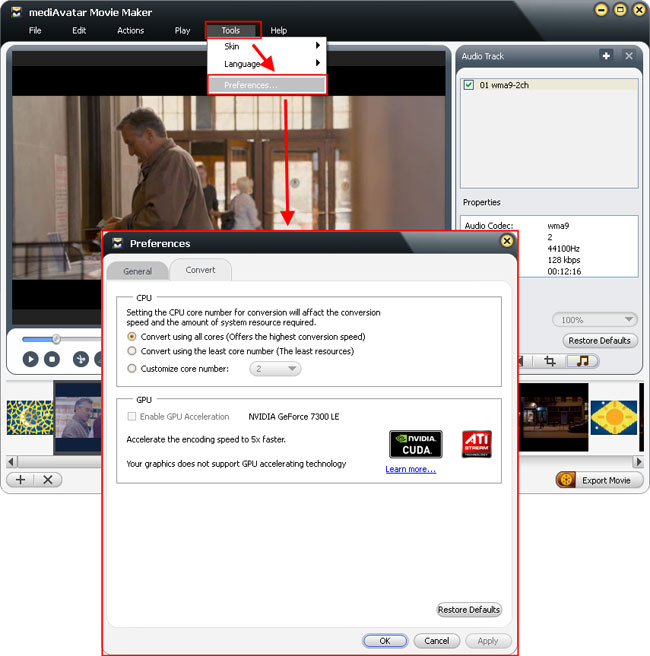
Convert Preferences
We mainly talk about the convert preferences, as in this part, we can acclerate your movie making progress by enabling some options.
Click "Tools > Preferences..." option to enter "Preferences" window, in which you can choose the CPU cores that used to make movie, and enable GPU acceleration if your computer has "NVIDIA CUDA" or "ATI Stream" GPU.
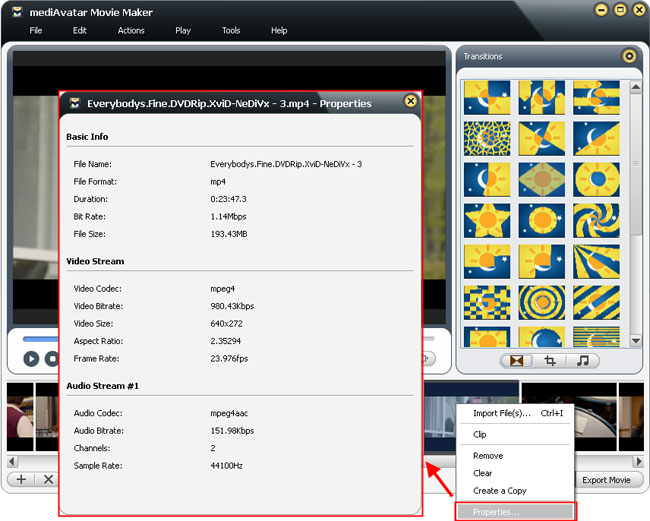
View movie properties
This option is just for you to check. Right click the movie in the list and choose "Properties..." option to check the complete information of each video file.
Want to explore more? Go to this mediAvatar Movie Maker to get a free demo version and start to make your own movies now.
Want to Explore More?