


How to convert, rip, transfer, backup and manage media files for iPod?
- A through guide about mediAvatar iPod Software Suite Pro
mediAvatar iPod Software Suite Pro packs iPod transfer, iPod backup, iPod video converter, iPod music converter, online video downloader/converter, iPhone ringtone maker and iPod touch PDF transfer into one, making it possible to transfer movies/music/ebooks/photos between iPod and computer, backup iPod files to iTunes library, convert and transfer any videos/music from computer to iPod, download videos from video sharing sites to iPod, create iPhone ringtones, and share media files among multiple iPod/iPhone devices.

We would like to show you how to convert, transfer, backup and manage media files for your iPod step by step.
For your clarity, we divide this guide into 5 parts:
- Part 1: Transfer files between iPod, computer and iTunes
- Part 2: Convert & transfer videos/music to iPod/iTunes
- Part 3: Download online videos to iPod
- Part 4: Create iPhone ringtones
After you download, install and start mediAvatar iPod Software Suite Pro, then connect your iPod or iPhone to your computer, then this iPod software will recognize it automatically and display its device information on the first interface.
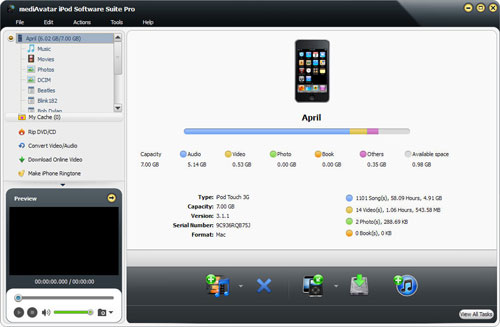
Tip: mediAvatar iPod Software Suite Pro allows you to connect as many iPod, iPhone devices as you want to manage and transfer media files for all of them at the same time.
Part 1: Transfer files between iPod, computer and iTunes
1. Transfer files from computer to iPod
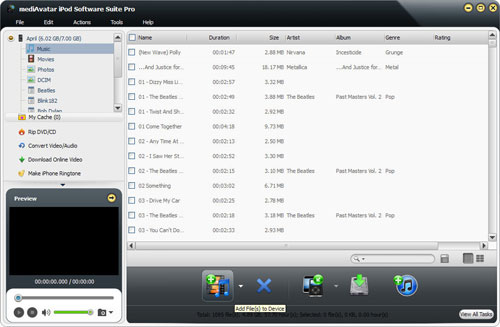
Step 1: Select a library or playlist to which you want to import files.
Step 2: Click the "Add File(s) to Device" drop-down button below the list, choose the "Add File(s) to List" option and select the files you want in the dialog that opens, then import them to your iPod, or choose the "Add Folder to List" option to locate the folder you want and import all the files in this folder to the list.
You can also right click the library/playlist, and choose "Add File(s) to List" or "Add Folder to List" option to import the files you want to load.
Tip: If you connect multiple iPod or iPhone devices, this iPod software can help you transfer the selected files to all these devices simultanously.
2. Backup iPod videos/music to your computer
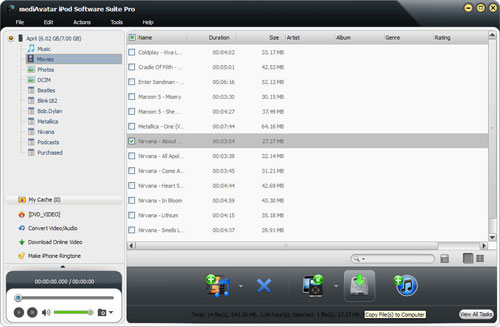
Step 1: Go to a library/playlist, and check the files you want to export.
Step 2: Click "Copy File(s) to Computer" button, and select the folder for saving the checked files in the dialog that opens to start to backup these files in your iPod to computer.
You can also right click the checked files, and select "Copy to Computer" option from the right-click menu to start exporting these files to the folder you select.
3. Backup iPod videos/music to iTunes
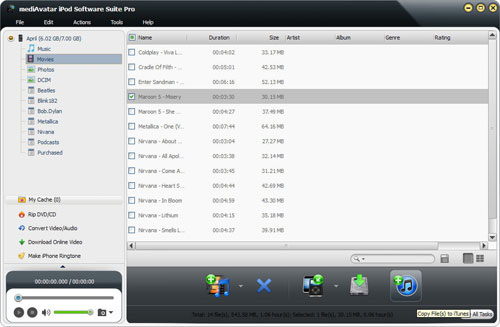
Step 1: Go to a library/playlist, and check the files you want to export to iTunes.
Step 2: Click "Copy File(s) to iTunes" button, then iTunes opens and this iPod backup starts exporting iPod files to iTunes.
You can also right click the checked files, and choose "Copy to iTunes" option to start exporting these iPod files to iTunes.
4. Share your files with other iPod/iPhone
Before sharing iPod files, make sure you have connected all the devices you want.
Step 1: Open a library/playlist in one of the connected devices, and check the files you want to copy.
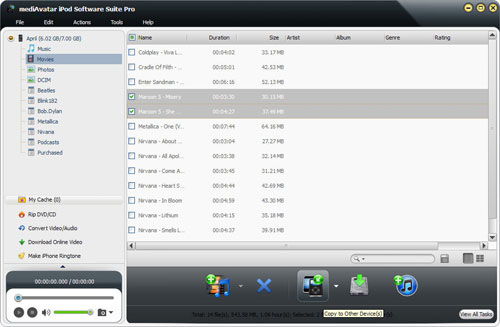
Step 2: Click "Copy to Other Device(s)" button to start exporting these files to the devices you select. If you want to transfer them to all the connected devices, then click to open "Copy to Other Device(s)" drop-download list and select "All Devices", then start to transfer your iPod files to all other iPod or iPhone devices.
Part 2: Convert & transfer videos/music to iPod/iTunes
Step 1: Select "Convert Video/Audio" node from the left tree to go to the "Convert Video/Audio" module.
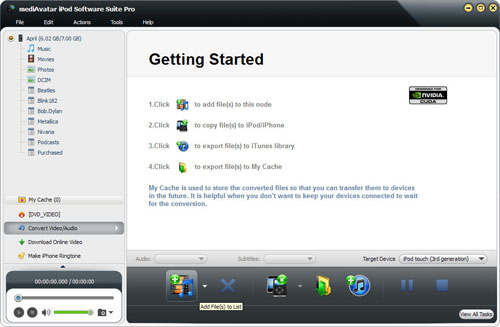
Step 2: Click the "Add File(s) to List" button, and select the files you want to convert in the dialog that opens and load them to the list. Or choose the "Add Folder to List…" option from "Add File(s) to List" drop-download list to locate the folder you want and import all the files in this folder to the list.
Tip: You can also right click the "Convert Video/Audio" node, and choose "Add File(s) to List…" or "Add Folder to List…" option to load the files you want to convert.
Step 3: Check the files you want to convert in the list, and click "Copy File(s) to Device" or "Copy File(s) to iTunes" button to copy the files into your iPod/iPhone or iTunes library. Or click "Copy File(s) to My Cache" button to save the converted video and audio files in the cache for later transferring.

Part 3: Download online videos to iPod
Step 1: Select "Download Online Video" node from the left tree to go to the "Download Online Video" module.
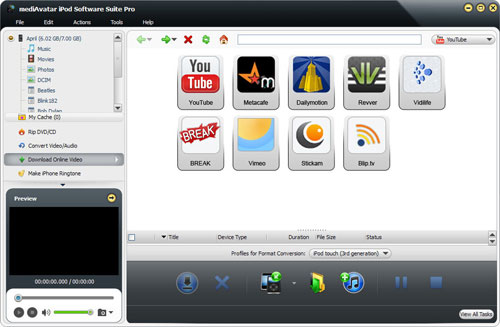
Step 2: From the right window above, click to enter one of the video sites. Or just enter the video URL in any of the above sites directly in the address bar. Go to the video you want to download, and click "Download" button on the bottom to download the video.

Step 3: After downloading, check the video from the download list, and click "Copy File(s) to Device" or "Copy File(s) to iTunes" button to transfer these downloaded videos to your iPod/iPhone or iTunes library. Or click "Copy File(s) to My Cache" button to save the downloaded videos in the cache for later transferring.

All the above features also appy to iPhone. So this part is just for iPhone.
Step 1: Select "Make iPhone ringtone" node from the left tree to go to the "Make iPhone ringtone" module.
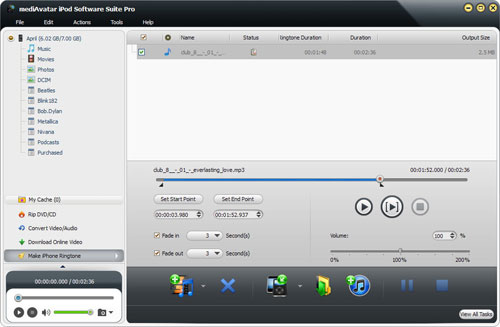
Step 2: Click "Add File(s) to List" button to load the video or audio files ready to convert.
Step 3: Select the file to convert in the list, and if you like, set the start point and end point to extract the segment as iPhone ringtone, and enable the "Fade in" and "Fade out" effects then set the fading time.
Step 4: Click "Copy File(s) to Device" or "Copy File(s) to iTunes" button to start making iPhone ringtones and transferring ringtones to iPhone or iTunes directly. Or click "Copy File(s) to My Cache" button to make iPhone ringtones and save the ringtones in the cache for later transferring.
There're many more features in this iPod software waiting for you to explore. Want to have a trial now? Go to this mediAvatar iPod Software Suite Pro for learn more.