


How to convert video and audio files of different formats?
- A guide about mediAvatar Video Converter
mediAvatar Video Converter supports almost all popular high definition and standard definition video formats, and also audio formats, enabling you to convert videos and audios from one format to another. Not only a video converter, it's also a video editor which can clip, merge, split videos, add transitions effects, adjust video image effects and do many other customizations.

We we would like to show you how to convert videos and audios as well as edit videos step by step.
For your clarity, we divide this guide into the following parts:
- Getting Started
- 3D Video Conversion
- Clip, Merge, Crop
- Add and Adjust Watermarks, Subtitles, Soundtracks, Special Effects, Transitions
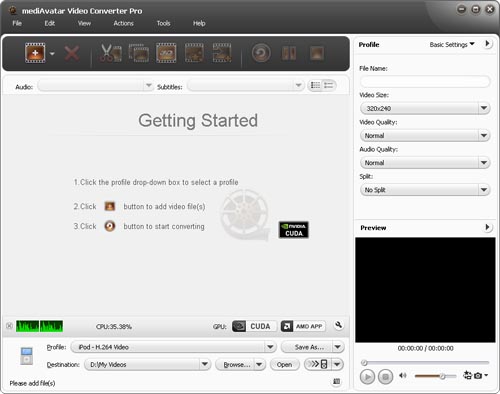
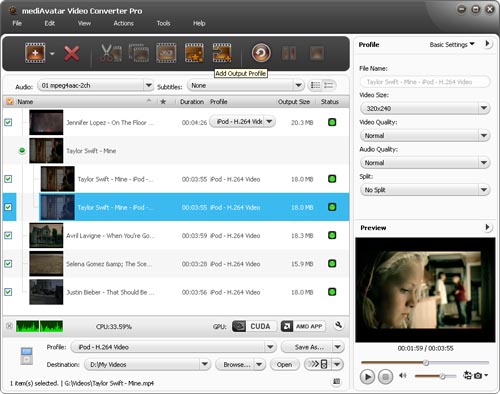
After you download, install and start mediAvatar Video Converter, you will see what its main window looks like:
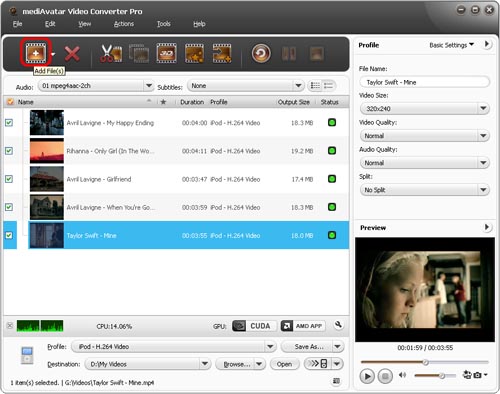
Step 1: Load videos into this video converter
Drag and drop videos you want onto the main program window, or click on "Add File(s)" button on the toolbar or "File > Add File(s)..." menu option to load the video files you want to convert. Or click "File > Add Folder" menu option to choose a folder and load all the supported video and audio files in this folder to the program's file list.
Step 2: Choose output format and destination
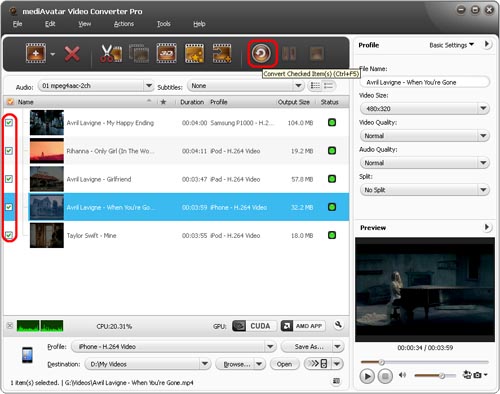
Check one or multiple video files, click "Browse" button to choose the output folder for saving the converted files.
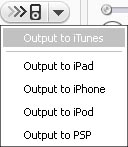
If you own iPad, iPhone, iPod, PSP or iTunes and have connected with your device, you can open the drop-down list to check the option you want beside "Open" button to make this video converter transfer the target videos to your iPad, iPhone, iPod, PSP or iTunes directly after conversion.
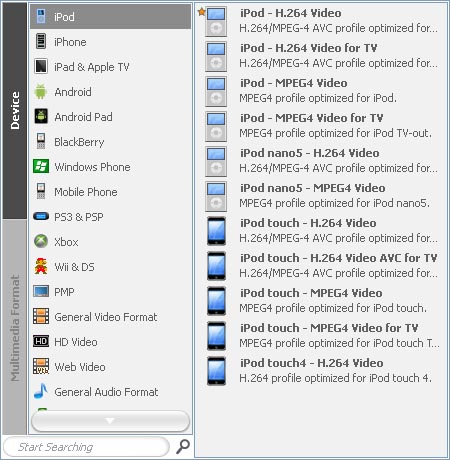
Click to open "Profile" drop-down list below the file list to set the same format for all the checked files, or set different formats respectively for different files. As below, this video converter sorts the conversion profiles by common use, devices and user-defined.
If you have multiple multimedia devices and want to play these files on all of them, you can add multiple output profiles for each file for the convenience of converting them at one go. Repeat the above step to add as much conversion profiles as you want.
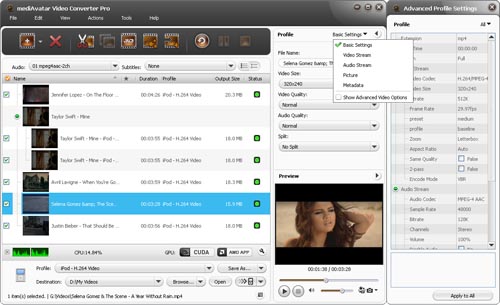
All the profiles are optimized in parameters by default, which enables you to choose the right one without any extra settings. However, this video converter also comes with lots of adjustable parameters to meet your diverse requirements. Click the down arrow on the right panel, choose "Basic Settings", "Video Codec", "Audio Codec", or "Metadata" option to adjust their respective parameter settings. Or click the right arrow to expand the "Advanced Profile Settings" window, from which you can set all the parameters freely as below.
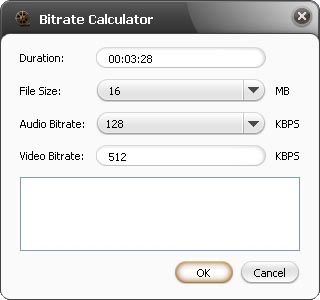
If you're not satisfied with the output file size, you can define it by yourself with the built-in bitrate calculator, in which you enter the file size you want, the tool will calculate its corresponding video bit rate, click "OK", then the output file size you want will be displayed in the file list.
To help facilitate away-from-keyboard conversions, this video convert software has the ability to automatically shutdown, stand by, or hibernate the computer or close itself after conversions are finished. To make use of these options, look under the "Actions > Post Task Actions" drop-down menu.
You can check the CPU usage below the file list. To make full use of your CPU or customize the CPU usage or conversion speed, go to "Preferences > Convert" tab by clicking "Preferences" button beside the CPU usage t to set the CPU core number for converting videos, or if you have GPU-enbaled CPU, you can enable NVIDIA GPU acceleration to speed up your conversions.
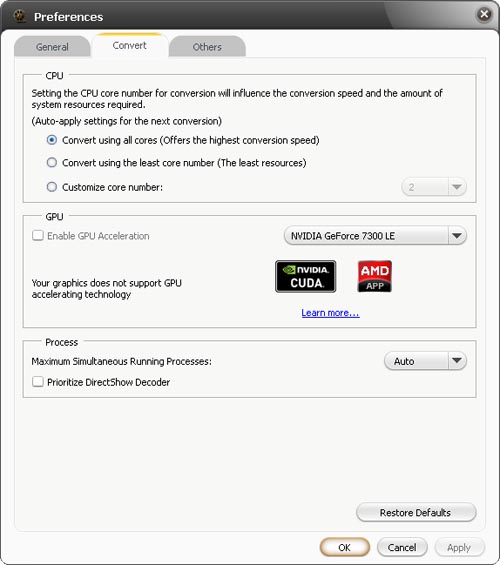
As the above image shows, you can also set the background run options and simultaneous processes according to your own needs.
Step 3: Convert videos
After the above settings, click "Convert" button on the toolbar to start converting video files! Okay, that's all!
It has never been easier to conver video files with mediAvatar Video Converter! However, this video converter gives you more!
To explore more customization features about this video converter, let's go on.
Choose the file you want to convert in the file list, and Click "3D" button on the toolbar to enter "3D Conversion" window.

2D to 3D
You can convert 2D standard videos to 3D videos, and watch it on TV.
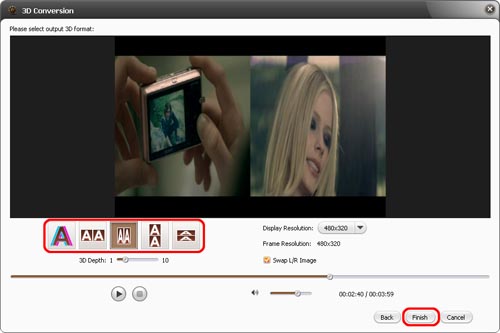
- Click “2D to 3D” button to open settings interface.
- Click “Anaglyph (Red/Cyan)”, “Side by Side”, “Side by Side (Half-Width)”, “Top and Bottom” or “Top and Bottom (Half-Height)” under the preview area, select an output mode.
Tips:
(1) You can drag the “3D Depth” control slider to set the depth.
(2) Check the “Swap L/R Image” option, you can switch left and right eye's image. - Click “Finish” to return to the main window.
3D to 3D
The software supports conversion between different 3D video format.
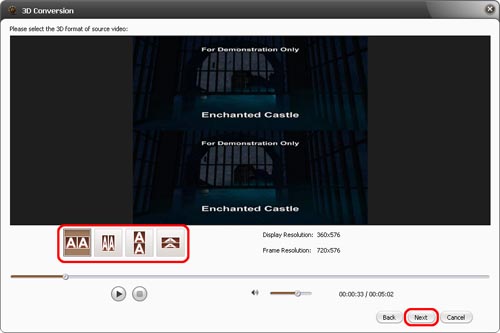
- Click “3D to 3D” button to open settings interface.
- Click “Side by Side”, “Side by Side (Half-Width)”, “Top and Bottom” or “Top and Bottom (Half-Height)” under the preview area, select a source mode.
- Click “Next” button to return to next step.
Click “Anaglyph (Red/Cyan)”, “Side by Side”, “Side by Side (Half-Width)”, “Top and Bottom” or “Top and Bottom (Half-Height)” under the preview area, select an output mode.
Tip: Check the “Swap L/R Image” option, you can switch left and right eye's image. - Click “Back” to return to previous step. If you click “Remove 3D Conversion Settings”, then the 3D conversion will be removed.
- Click “Finish” to return to the main window.
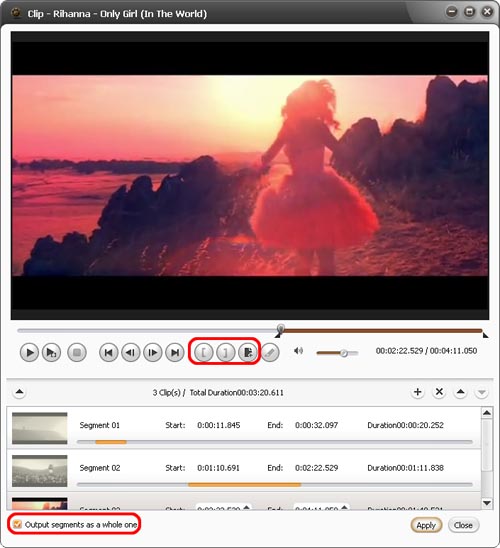
Choose the video you want to clip from the file list, click "Clip" button on the toolbar to enter "Clip" window.
Click "New Clip" button to add a new clip into the segment list, then set its start time and end time by entering the values in the boxes or dragging the sliders in the above player. Repeat this to extract as many clips as you want.
If you check "Output segments as whole one" option, then all the clips in the list will be merged into a single file.
Click "Move Up" or "Move Down" button to adjust the order of these clips.
Select the videos or clips in the file list, and click "Merge" button on the toolbar to merge these into a single file.
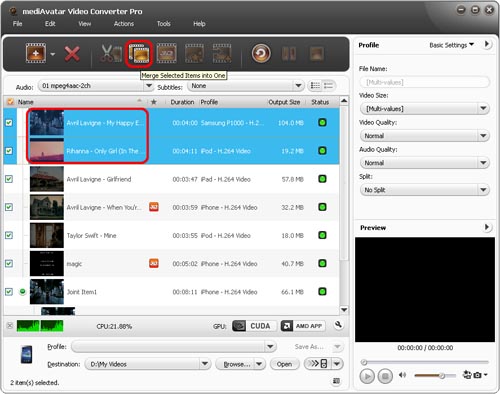
Double click the joint item or select the joint item then click "Edit Joint Item" on the toolbar, the "Joint Item" window appears. Check "Enable Transitions" option, select the transition you want from the transition list.

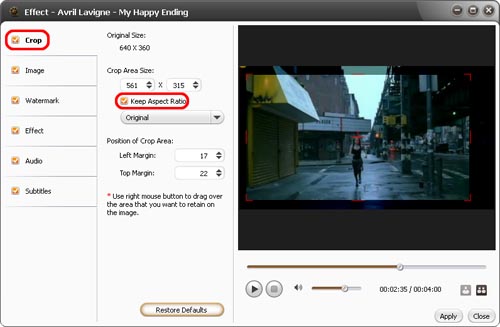
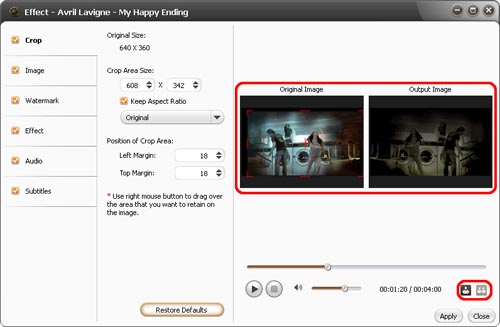
Choose the video you want to crop, and click "Effects" button on the toolbar to enter "Effect" window. The "Crop" option is checked by default.
Set the "Crop Area Size", "Left Margin", "Right Margin" by directly enter the values respectively, or drag the lines on the image at the right player. Check "Keep Aspect Ratio" option, or choose the aspect ratio you want.
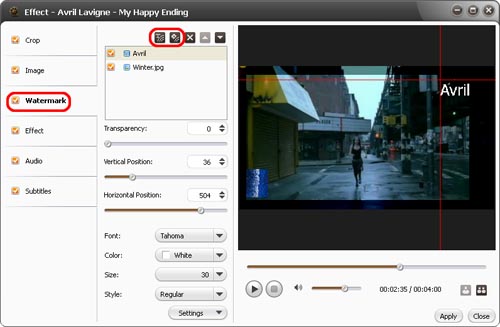
Choose the video you want to crop, and click "Effects" button on the toolbar to enter "Effect" window. The "Watermark" option is checked by default.
Click "Add Text Watermark" or "Add Picture Watermark" button above the watermark list, enter the text or choose the picture you want, then adjust the settings of the watermark. You can add as many watermarks as you want.
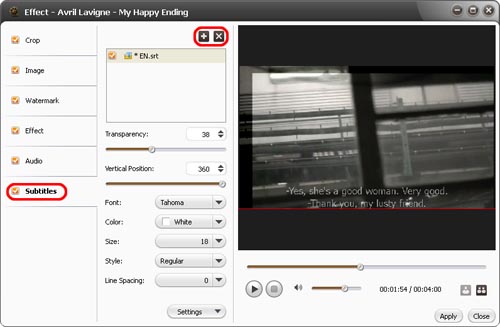
Choose the video you want to crop, and click "Effects" button on the toolbar to enter "Effect" window. The "Subtitles" option is checked by default.
Click "Add Subtitles" button above the subtitle list, and load the subtitle file, then adjust its parameters including Transparency, Vertical Position, Font, Color, Size, Style, Line Spacing.
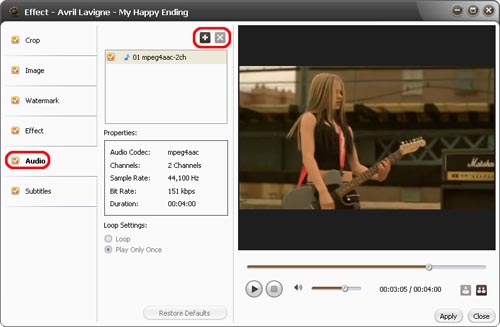
Choose the video you want to crop, and click "Effects" button on the toolbar to enter "Effect" window. The "Audio" option is checked by default.
Click "Add Audio Track" button above the audio track list, and load the audio track you want.
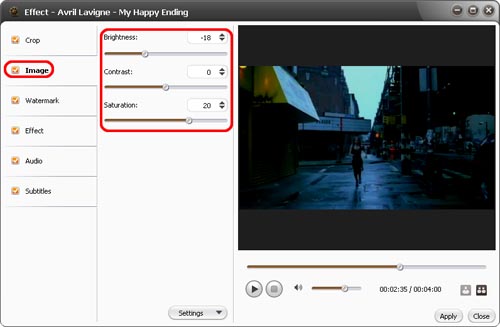
Choose the video you want to crop, and click "Effects" button on the toolbar to enter "Effect" window. The "Image" option is checked by default.
In this tab, you can adjust the brightness, contrast and saturation of the video image by dragging the sliders or entering the values.
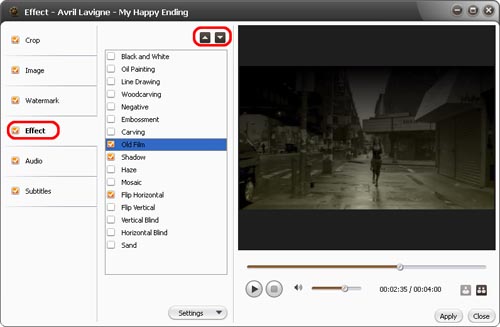
And you can also add special effects to the video. The "Effect" option is checked by default. In this tab, you can add one or more effects to the video.
After all these effect adjustment, you can click "Comparing Preview" button at the right bottom of the player to preview the original and fixed image effect abreast.
Want to have a trial now? Go to this mediAvatar Video Converter for free download to find more.